The Benefits Of Making Berry Jam With Fresh Berries
How To Make Berry Jam With Frozen Berries
To make the most out of berry jam-making with fresh berries, explore the following benefits. Discover the health benefits of using fresh berries, the superior flavor and texture of fresh berry jam, and the cost savings incurred in jam-making when using fresh berries.
Health benefits of using fresh berries
Using Fresh Berries: The Power of Health Inside
Berries are extremely beneficial to human health, and when used fresh, they have even more advantages. Here’s a look at some amazing health benefits of using fresh berries.
- Fresh berries are rich in fiber, which promotes gut health and reduces the risk of bowel problems such as constipation.
- Antioxidants present in fresh berries play a significant role in reducing inflammation throughout the body, leading to an overall reduction in chronic disease risks.
- Fresh berries contain essential vitamins and minerals like Vitamin C, Potassium, Folate, Iron that help reduce blood pressure levels.
- The consumption of fresh berries has been shown to aid in weight loss by slowing digestion and reducing hunger pangs.
- The polyphenols found in fresh berries have known cancer-fighting properties that reduce the risks of various types of cancers.
In addition to these benefits (that we mentioned earlier), studies have also found that consuming fresh berries can enhance brain function, strengthen immunity naturally and promote healthy skin tone. Get ready for some berry good news!
Missing Out on the Wonder of Fresh Berries?
Don’t miss out on the opportunity to add fresh berries to your diet! Not only do they impart an unmatched taste sensation but having it often could also lead to being a healthier version of yourself! So why wait? Incorporate these power-packed fruits into your daily routine and enjoy a healthy life.
Satisfy your taste buds with the unbeatable juiciness and crunchiness of fresh berry jam- sorry, store-bought jam, you just can’t compare.
Superior flavor and texture of fresh berry jam
Freshly harvested berries create a unique texture and flavor in homemade berry jam that cannot be replicated with frozen or store-bought options. This quality is key to creating an exceptional experience for your taste buds and elevating your overall cooking skills.
- Freshly harvested berries provide a juicer consistency, making the jam flavors more potent, delivering an unmatched sensory experience in every spoonful.
- The natural sugar content found in fresh berries create a perfect level of sweetness without using an excess amount of added sugars, ensuring a healthier option for strawberry shortcakes and toast toppings.
- Without any added preservatives or artificial coloring, fresh berry jam retains its natural colors for a more vibrant presentation on your breakfast plate.
- Using freshly picked berries supports local farmers while sustainably sourcing ingredients to reduce our carbon footprint.
It’s vital to note the climate also influences berry ripeness levels – hence why seasonal jam-making is crucial. Homemade pie fillings and jams can capture this diversity of flavor peaks with distinctive taste notes.
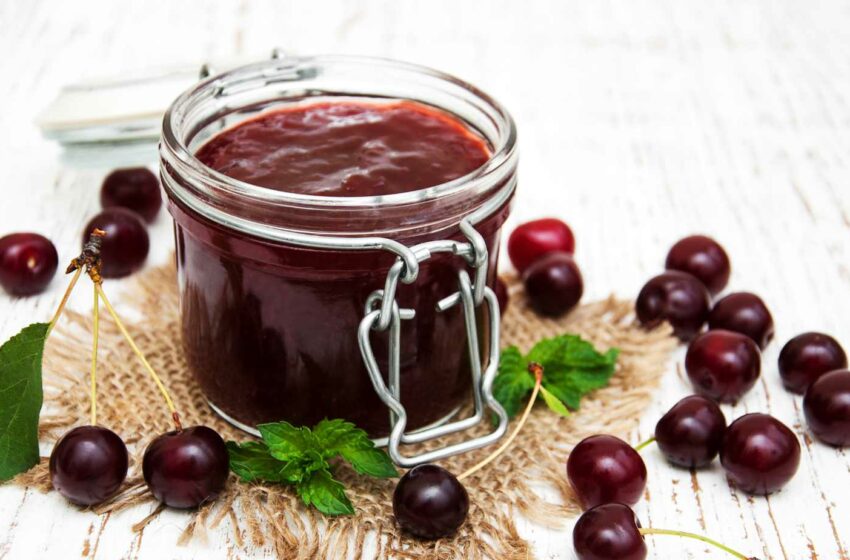
A pro tip would be storing your jam in glass jars at room temperature to preserve freshness and flavor so that the true essence of fresh berry tastes are successfully maintained even months after making it.
Don’t be a jamoke, cut costs and savor the flavor with fresh berries in your homemade jam.
Cost savings when using fresh berries in jam-making
When utilizing fresh berries for making jam, there are several cost savings to take advantage of. For one, the abundance of fresh berries during peak season leads to lower market prices. Additionally, using in-season berries decreases transportation costs as the supply chain is shorter. When compared with store-bought jam, homemade berry jam can also be more cost-efficient, especially when accounting for packaging and marketing expenses.
To illustrate the potential cost savings when utilizing fresh berries for jam-making, a table can be created. This table highlights the price comparison between store-bought and homemade berry jam.
| Berry Jam | Price per jar |
| Store-bought | $5 |
| Homemade with Fresh Berries | $2.50 |
As demonstrated by this table, purchasing fresh berries and making homemade jam on your own can result in significant cost savings compared to buying store-bought varieties.
Moreover, using fresh berries results in better quality and taste in the finished product. Freshly picked berries have higher nutritional value and superior flavor compared to frozen or canned alternatives. Purchasing in-season, locally sourced berries not only saves money but also supports local agriculture and reduces carbon footprint.
In history, preserving fruits through jams dates back centuries ago with mentions found in ancient Roman texts. People throughout history made jams as a way of preserving their summer harvest for enjoyment all year long. With the continued popularity of homemade jams today, making use of fresh fruits remains a cost-effective and delicious alternative to store-bought options.
If life gives you fresh berries, make berry jam and thank the universe for providing such a deliciously sweet distraction from all your problems.
How to Make Berry Jam With Fresh Berries
To make delicious berry jam with fresh berries, follow these simple steps for each sub-section: First, prepare the berries for jam-making. Then, cook the fruit and sugar mixture until it reaches a desired consistency. Next, test the jam for doneness to ensure it is ready. Finally, fill and seal the jars, and enjoy the benefits of homemade berry jam made with fresh ingredients.
Preparing the berries for jam-making
Berries that are not well-prepared for jam-making could result in a runny, under-set or overly thick mixture. To ensure the best results, it is essential to prep the berries thoroughly.
To prepare the berries for jam-making without compromising the quality, follow these three simple steps:
- Wash and rinse the berries under cold running water to remove any dirt or debris.
- Cut off the stems and hulls from each berry, removing any green patches or lame-looking spots.
- Mash up the prepared berries using a potato masher or food processor until you get your desired texture.
It is important to note that when preparing berries for jam-making, it is best to use ripe ones as they contain more natural pectin, which helps in setting up the jam.
By following these tips to prepare your fresh berries for jam-making, you are sure of getting top-quality results every time. Turning the fruit and sugar into a bubbling cauldron of deliciousness – it’s like a scene straight out of a witch’s kitchen.
Cooking the fruit and sugar mixture
The key process of heating the mashed fruit and sugar mixture is a critical step in achieving the perfect berry jam. The precise technique for this step can vary depending on the type of fruit used, but it should always be done with care and precision to achieve optimal results.
- First, pour your prepared mixture into a large saucepan on medium heat.
- Stir regularly for approximately 10 to 15 minutes, or until the sugar dissolves.
- Once the sugar is dissolved, bring the mixture to a rolling boil.
- Boil the mixture for an additional 10 minutes, stirring occasionally to prevent sticking and burning.
- Test that jam has reached the setting point by spooning a small amount onto a cold plate and cooling in a refrigerator for 1 minute. It should wrinkle when pushed.
It’s important not to overcook your jam mixture, as this can cause it to darken and become too solid or grainy. Be sure to stir well throughout cooking and keep an eye on it carefully.
One thing to keep in mind is that preserving berries was once a necessary task for survival through the winter months. This method ensured fresh produce could last longer than its natural season.
Is your jam at the right temperature or are you just happy to stir me?
Testing the jam for doneness
When determining the readiness of your berry jam, it is important to assess its doneness thoroughly.
To test the consistency of your jam, follow these 4 steps:
- Place a small amount of jam on a chilled plate
- Allow it to cool for a few seconds
- Test the texture by pushing it with your fingertip
- If it has thickened to your desired consistency and wrinkles when pushed, the jam is ready.
It’s important to note that overcooking may result in a too-firm or rubbery texture.
Once done, carefully spoon the hot jam into clean jars and store them at room temperature for up to 1 year. Refrigerate after opening.
Ensure you have tested the jam sufficiently before storing as undercooked jams can spoil easily.
Don’t skip this crucial step of testing the jam’s doneness! A ruined batch of berry jam can lead to disappointment and wasted time and ingredients.
I always struggle with filling jars, but thankfully jam doesn’t have to be perfect to taste delicious, unlike my love life.
Filling and sealing jars
To preserve the freshness and flavour of your berry jam, it is important to fill and seal the jars correctly. Here’s how to do it:
- First, sterilize the jars and lids by boiling them for 10 minutes. Allow them to air dry completely.
- Using a ladle, carefully pour the hot jam into each jar, leaving about half an inch of space at the top.
- Quickly wipe the rims of the jars with a damp cloth and seal them tightly with the lids. Turn them upside down for 5 minutes to ensure a proper seal.
It’s essential to store your jam in a cool, dark place away from direct sunlight or heat sources. This will help maintain its quality for up to a year.
Once sealed, your jam will be ready to enjoy or give as gifts to friends and family. Just be sure to label each jar with the date you made it!
A friend once tried making berry jam without properly sealing the jars and ended up with mouldy jam after just a few weeks! Don’t make that mistake – take the extra time to fill and seal your jars properly for optimal results.
Remember, a spoonful of sugar may help the medicine go down, but a whole jar of it will make your berry jam too sweet to stomach.
Tips For Successful Berry Jam-Making
To make perfect berry jam, you need to follow some crucial tips. When making berry jam with Fresh Berries, you need to be very careful in choosing the right berry varieties for jam-making. Additionally, you must use the correct amount of pectin to make your jam successful. In order to preserve your jam for longer use, you should learn good storing and preservation techniques. Finally, it is essential to be aware of the common problems that come with jam-making and the solutions to them.
Choosing the right berry varieties for jam-making
For successful berry jam-making, it is crucial to select the appropriate variety of berries. Here are some tips to help you decide which berries are best for your homemade berry jam:
- Consider the acidity level: Berries with lower pH levels like blackberries and raspberries make excellent preserves since they have a high acidity that helps prolong their shelf-life.
- Fruit firmness: Look for ripe berries that are firm enough to maintain texture through the jam-making process, but not too hard.
- Sugar content: For an intense flavor, use sweeter fruits like strawberries, blueberries, or cherries since they require less sugar to compensate for tartness in taste.
- Aroma: Choose berries with a fragrance as it will enhance the flavors of your jam.
While choosing berry varieties for homemade jams, remember that there is no one-size-fits-all rule since every berry offers distinct complexities in taste and texture. Testing various combinations of berries may create an ideal blend perfect for your taste buds.
To yield a delicious and perfectly set strawberry jam or raspberry jelly without adding commercial preservatives demands picking superior quality fruit at its peak freshness. Mastering creating the best berry jam requires experimenting with different varieties until you find a combination that satisfies your craving.
Don’t settle for store-bought jams when summertime offers lovely fruits by the basketful! Challenge yourself to craft unique styles and flavors of fresh jams with locally grown berries while supplies last this summer.
If you’re not careful with your pectin amounts, your jam could end up as a fruit prison rather than a fruity spread.
Using the correct amount of pectin
When preparing berry jam, it is crucial to ensure that the appropriate quantity of pectin is used. This is because pectin is responsible for setting the jam, and insufficient amounts can cause the jam to not set, while excessive quantities can make the jam hard.
To use the correct amount of pectin for your berry jam, follow these five steps:
- Start by selecting the type of pectin that matches your recipe requirements.
- Measure your fruit precisely and weigh it. For every two cups of fresh fruit mash or juice – add one packet (1 and 3/4 oz) or three tablespoons (45 mL) powdered commercial pectin.
- Add sugar if necessary according to what recipe you are following.
- Incorporate both ingredients well and stir them together over heat until dissolved completely.
- Cooking times vary with each fruit, but typically cooking takes about 10 minutes over medium-high heat.
It’s crucial to keep in mind that various fruits contain different amounts of natural pectin within their flesh; however, using a store-bought version will provide consistency across both the flavor and texture of preserves.
For perfect preservation without any confusion around quality assurance, be sure always to purchase a high-quality pectin brand from reputable sources such as a specialty grocer. Now you know how to efficiently utilize pectin; ensure your berry jams turn out scrumptious every time!
Preserve your sanity and your jam by storing it properly – or else it’ll be a berry big mess.
Storing and preserving berry jam
To ensure the longevity of your homemade berry jam, proper storage and preservation techniques are crucial. Here’s how to keep your precious jam fresh and flavorful for months to come.
- After cooking the jam, transfer it into sterilized jars while still hot. Leave a 1/4 inch of headspace at the top of each jar.
- Wipe the rim and sides of the jar with a clean cloth or paper towel to remove any residue that may interfere with sealing.
- Place a lid on each jar and tighten it until you feel resistance but do not over-tighten.
- To can the jars, place them in a large pot with boiling water that covers them by at least one inch. Process for 10 minutes then remove from heat and let cool completely before storing.
- If you prefer not to, store the jars in a cool and dry place away from direct sunlight. Avoid exposing them to temperature fluctuations or high humidity levels as this can cause spoilage.
- To preserve freshness, refrigerate after opening and use within 2 weeks.
It is important to note that improperly canned or stored jam may lead to botulism poisoning. Be sure to follow proper methods for canning or opt for refrigeration if unsure.
Properly stored berry jam is a great addition to toast, biscuits, and more. If you prefer a softer texture, try adding some honey instead of sugar during cooking. This will also help extend its shelf life as honey naturally preserves foods.
When life gives you fruit that won’t set, make salsa and call it a day.
Troubleshooting common jam-making problems
Difficulties in the Jam-Making Process
Jam-making is a delicate process, and despite following recipes to the letter, issues will still arise. Here are six methods to rectify common issues that will make it easier to succeed in your jam-making efforts:
- Adjust sweetness levels: If your jam is too sweet or not sweet enough, adjust the amount of sugar added accordingly.
- Fix texture: You may experience an excessive amount of stiffness in certain batches; adding a small amount of water or fruit juice can help loosen the mixture.
- Correct acidity levels: The addition of citric acid or lemon juice can be used when some flavors turn out too acidic.
- Address overcooking: Overheating may cause caramelization, which turns your jam into candy-like consistency. To fix this issue, remove from heat immediately and mix in cold water until you reach the right texture.
- Combat crystallization: Crystallization occurs when jars have not been correctly sterilized before use. If this happens, you can save the batch by reheating and adding more sugar.
- Revive “runny” jams: If your batch appears runny, try boiling again with additional pectin or lemon juice.
Remember that each batch will have its unique properties and flaws. However, following these six steps might come in useful.
If you’re struggling with retaining a consistent texture throughout different batches you make, consider assessing how ripe or fresh your fruits are amongst other things.
Do you know what Marie Antoine Carême had to say about the art of jam making? In his gastronomic memoirs he stated that:”…preserves should never compromise on flavor for style.”