Making The Pie Crust
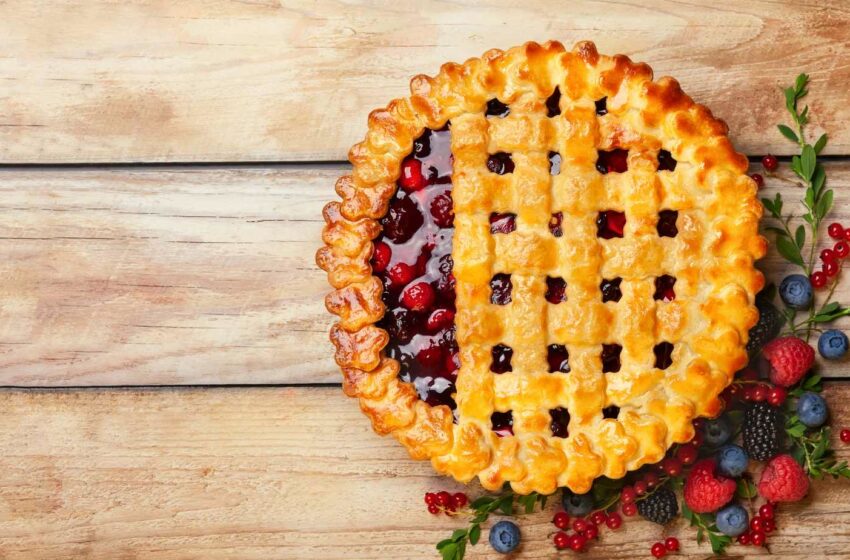
How To Make Blue Berry Pie With Frozen Berries
To Prepare Blueberries for Frozen Storage
Blueberries can be a perfect addition to a variety of recipes. Before you incorporate these juicy blue fruits into your dish, it is crucial to take the necessary steps to freeze them correctly. Follow these simple steps to prepare blueberries for frozen storage.
- Wash the blueberries using cold, running water and place them on a baking sheet lined with paper towels.
- Dry them off by patting gently with more paper towels.
- Remove any green stems or leaves before transferring the blueberries into an airtight container.
- You can also pack the berries into individual serving sizes so that you only thaw what you need.
Remember that once you freeze berries, they will be hard and clumped together. To avoid this, spread out the berries on the baking sheet and freeze them first before moving them to the container. Moreover, it is best to use frozen blueberries within six months of freezing.
Don’t let unpreparedness ruin your recipe when fresh blueberries are not available anymore. Follow these guidelines on properly freezing blueberries and always have them ready in your kitchen whenever needed!
Making a pie crust from scratch is like trying to solve a Rubik’s Cube blindfolded, but with the right mix, you’ll have everyone fooled.
Pie Crust Mix
Using a pre-made mixture of dough, known as the Crust mix, is an easy way to prepare pie crust quickly.
- Pre-made mixes come in various sizes and brands to fit your specific needs
- It includes all necessary dry ingredients, like flour and salt.
- Most versions require you to add shortening or butter-based on their instructions.
- Saves time and effort to measure and combined each ingredient.
- You can get creative by adding spices or herbs for different occasions.
An important note is that while using pie crust mix is a time-efficient option, it may lack the handmade quality you would have if you made the dough from scratch.
Pro Tip: To add flakiness to your crust, submerge the shortening into small pieces of flour until coated before adding it into the mix.
Why settle for a warm welcome when you can have a cold water bath before cooking?
Cold Water
Using a low temperature liquid can be imperative in many cooking and baking recipes. Utilizing an aqueous fluid that has been sufficiently chilled serves multiple purposes other than just cooling. It is quintessential to maintain ingredients’ integrity by slowing down their reaction rate, thus minimizing spoilage, discoloration, and clumping.
Additionally, “cold water” restricts bacterial growth, making it the ideal medium for creating products like bread dough and pie crusts as the carbon dioxide created by yeast can work better in cooler environments.
When gathering ingredients for almost any recipe, it’s crucial to utilize only cold items unless otherwise stated. This includes water used in baked goods such as pies or pastries – a chilled liquid will help ensure your dough stays flaky and doesn’t become gummy. Further, when working with hot sugar syrups or caramelized mixtures where you must cool everything quickly, cold water serves as an excellent tool.
It’s important to note that dirty water from the tap should not be used instead of clean filtered cold water due to potential contamination with bacteria or minerals. Therefore using a clean source of cold water can provide a considerable advantage when working on delicate dishes or recipes that require precise measurements for consistent results.
You can never have too many mixing bowls, unless you’re on a reality cooking show and they only give you one.
Mixing Bowls
Mixing Vessels
Mixing vessels are essential tools for preparing food items in cooking. Mixing bowls can come in various shapes and sizes to cater to different needs.
- Versatility: These vessels can be used to stir, whisk, or beat ingredients needed for recipes.
- Material: They are commonly made from stainless steel, glass, ceramic, or plastic which vary in durability and weight.
- Size: Choosing the right size is important as it affects the volume and amount of ingredients needed.
Moreover, certain mixing bowls come with a non-slip bottom or handle to aid in stability and ease of use. Using a separate bowl for each ingredient assures even mixing and prevents clumping.
To elevate baking efficiency, refrigerate the bowl before use when making whipped cream or dough that requires chilled ingredients. Also, clean them well after each use to preserve its longevity.
Who needs anger management when you have a rolling pin and a ball of dough?
Rolling Pin
This essential kitchen tool is used to flatten and shape dough for baking. A cylindrical and elongated tool that can be made of different materials like wood, metal or plastic, this item goes by the name of “Dough Roller”.
The Dough Roller can be easily purchased both online or in a store. In table format, its features may include material, weight, and price. Designed to make the process of creating and baking different types of dough easier and more efficient.
Used across different cultures worldwide, this versatile tool has been around for centuries. It’s often mentioned as a utensil used in ancient Egypt for bread-making purposes but with varying structures. With the advancement of technology and design, the Dough Roller has evolved into a must-have kitchen gadget for every household that bakes their own bread at home.
Even a mediocre cook can impress their guests with a pie, as long as they have the right dish – and the ability to hide store-bought filling.
Pie Dish
For the perfect pie, selecting an appropriate vessel for baking is crucial. A deep and wide container can hold more filling and help in even baking. It should be heat-resistant and able to withstand high temperatures.
A suitable pie dish should have a depth of about 1.5-2 inches and a diameter of 9-11 inches. It can be made of materials like ceramic, glass, or metal. A glass dish offers visibility and is good for ensuring that the base is evenly cooked.
Below is a table showcasing different materials that can be used for making pie dishes, along with their pros and cons:
| Material | Pros | Cons |
| Ceramic | Even heating, moisture retention | May crack if not handled properly |
| Glass | Clear visibility, even heating | Risk of shattering under high temperatures |
| Metal | Durable, distributes heat evenly | May react with acidic fillings |
For best results, avoid using disposable tin plates as they may result in an uneven crust and soggy bottom.
Selecting the right pie dish ensures that the baked product turns out perfectly cooked. The material you choose also contributes significantly to the final outcome.
Did you know that some traditional American pies were baked using earthenware pots? (source: Smithsonianmag.com)
Get ready for some serious rolling action, because it’s time to give that dough a good spanking and make it into the perfect pie crust.
Prepare Pie Crust
To prepare the perfect pie crust for your delicious blueberry pie made with frozen berries, follow these simple steps. With our sub-sections, you can easily customize the pie crust mix package for your desired consistency. Add frozen blueberries and mix well until dough is formed.
Follow Instructions on Pie Crust Mix Package
To properly prepare pie crust, follow the instructions provided on the packaging of your chosen pie crust mix. This will ensure the best results and a delicious final product.
Here’s a four-step guide to following the instructions on your pie crust mix:
- Preheat your oven according to the package directions.
- Combine the mix with any necessary wet ingredients such as water or butter.
- Knead and roll out the dough according to thickness recommendations.
- Place the prepared crust into a pie dish and fill with desired filling.
It’s important to note that different brands of pie crust mixes may have slight variations in their instructions. Be sure to read them thoroughly before starting to prevent any mistakes.
For best results, make sure your ingredients are at room temperature before mixing and use cold water if possible. Additionally, using a metal or glass pie dish can help prevent soggy crusts.
Overall, following the instructions on your pie crust mix is crucial for success in pie baking. By doing so, you’ll be able to create perfectly flaky and tasty crusts every time.
Only amateurs use fresh blueberries, frozen ones add that extra chill to your pie.
Add Frozen Blueberries to The Mix
Blue-ify Your Crust: How to Add Frozen Blueberries to Your Pie Mix
Blueberries are a delicious addition to any fruit pie. Adding frozen blueberries can elevate the flavor of your crust to new heights. Here are four points to consider when preparing your blueberry-laced crust:
- Thaw the blueberries before adding them to the mix.
- Avoid over-stirring, as this can cause the fruit to break down and release excess liquid.
- Add sugar or sweetener sparingly, as blueberries tend to be sweeter than other fruits used in pies.
- Bake the pie for an additional 10-15 minutes longer than usual when using frozen blueberries.
Furthermore, using frozen blueberries allows you to enjoy them year-round, regardless of whether they are in-season or not. These little powerhouses contain antioxidants that help reduce inflammation throughout the body. A recent study by Tufts University found that consuming blueberries regularly can also improve cognitive function in older adults.
So next time you prepare a pie crust, consider adding some frozen blueberries into the mix for an added burst of flavor and health benefits. Happy baking!
(Source: https://www.tufts.edu/news-center/2012/08/Anthocyanins_Slurries/)
Mixing dough is like a workout, except instead of a six-pack you get a six-inch pie crust.
Mix Well Until Dough is Formed
When it comes to creating the perfect pie crust, it is essential to mix the ingredients well until a uniform dough is formed. This step can make or break your final product. Here’s how you can achieve a perfectly mixed pie crust:
- Start by measuring out all of your ingredients precisely according to your recipe.
- Pour your dry ingredients, like flour and salt, into a mixing bowl and stir them together until they are evenly distributed.
- Add your fat, whether it be butter, shortening or lard, cut into small cubes to the dry mixture.
- Using clean hands or a pastry blender, quickly combine the fat into the dry ingredients until it resembles a coarse meal.
- Next, add cold water one tablespoon at a time and mix gently with a fork until the mixture starts clumping together.
- Once all of the water has been added, use your hands to gather any remaining loose bits of dough in the bowl and knead for about 30 seconds or until you’ve formed an even dough ball.
It’s important not to overwork the dough as this can result in tough pastry that won’t hold up properly once filled with fruit or other ingredients.
There are some additional tips that can help ensure success in achieving that perfect pie crust texture. For example, refrigerating your dough for at least 30 minutes before rolling it out can help prevent shrinkage during baking. Using ice-cold water instead of room temperature also helps keep the fat from melting too quickly while working with it.
Preparing pie crust has been an art form for centuries dating back to ancient Greek civilizations. Back then, fruit fillings were not used but instead baked goods like honey cakes were created using phyllo-style pastry made from flour and oil-based “shortening.” As time progressed cooks refined their techniques by incorporating butter-rich recipes which lent flakiness and flavor by pairing savory crusts with sweet fruit pies. Today, there is no limit on pie crust creativity and the possibilities are endless.
Get ready to roll with the pastry puns, because this pie crust is about to be flaky perfection.
Roll Out Pie Crust
To roll out the pie crust for your blueberry pie with frozen berries, you need to get three things right. Flouring the surface before rolling the dough ensures it won’t stick to your counter. Then, use a rolling pin to create an even thickness for your crust. Lastly, place the final product carefully onto the pie dish without breaking it.
Flour Surface Before Rolling Dough
Preparing the Surface for Dough Rolling
Before rolling out your pie crust, it’s essential to have a surface that allows optimal handling and prevents sticking. Ensuring that your work surface is properly floured is fundamental in achieving the desired results of your baked goods.
Here are five easy steps to flouring your surface before starting the process:
- Clean your work station thoroughly.
- Lightly sprinkle a layer of flour over the surface.
- Spread out the flour evenly on the surface with a smooth movement using a brush or your hand.
- Remove any excess flour remaining on the surface.
- You’re ready to start rolling!
It’s worth noting that too much flour can affect the dough’s consistency, leading to uneven baking or cracks in final products such as pies. Also, depending on the type of dough you’re preparing, some recipes call for alternative flours such as cornmeal or semolina.
By utilizing these simple steps as part of your baking routine, you will elevate your results significantly. Make sure to adjust accordingly based on your recipe specifications.
The history behind working with floured surfaces dates back thousands of years when ancient Egyptians began grinding wheat for bread-making purposes. Over time modernized techniques were created within bakeries worldwide resulting in optimal outcomes through advancements in handling techniques and precision equipment.
Remember, the key to a successful roll out is to avoid creating a crust with more holes than Swiss cheese.
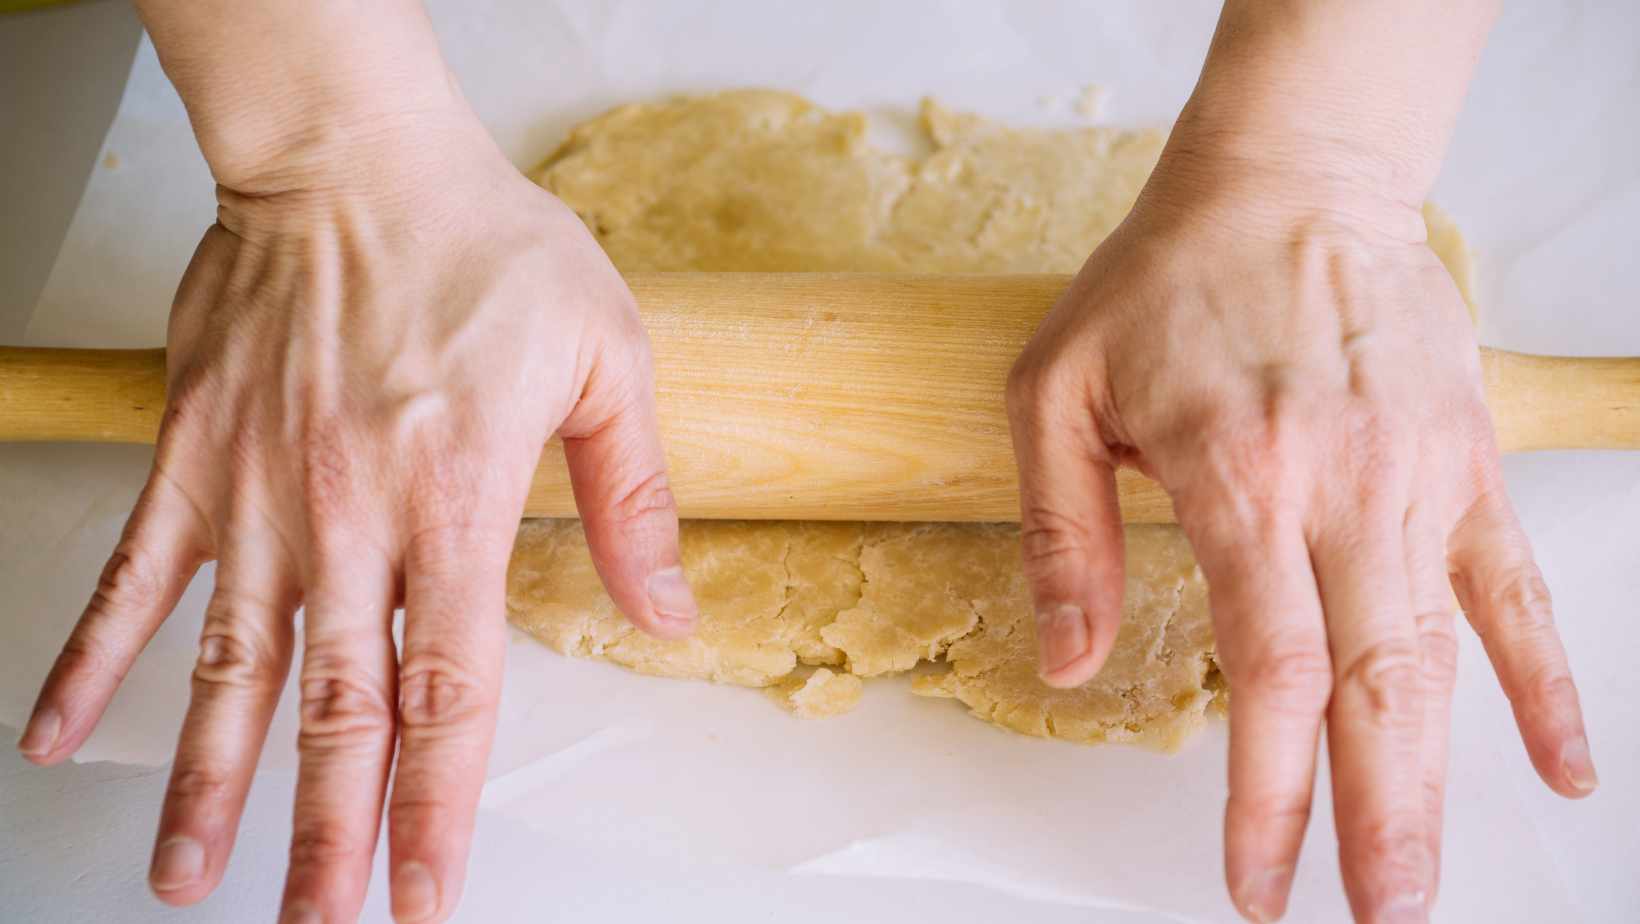
Use Rolling Pin to Create Even Thickness
To achieve uniform thickness for your pie crust, use a rolling pin. This tool helps make sure that the dough is levelled and uniformly thick.
Follow these four simple steps to achieve a levelled even thickness:
- Before starting, dust the rolling pin with some flour so that it does not stick to the dough.
- Place the dough onto a floured surface and press it down with your hands.
- Starting from the center of the dough, roll outwards in all directions using consistent pressure until you reach the desired thickness.
- Rotate the crust 90 degrees and repeat until you have an evenly thin crust.
It is important not to overwork or over-roll the dough, as this can cause it to become tough. Also, avoid stretching or pulling the edges of the dough while rolling it out.
Using a rolling pin to create even pie crust has been a tradition since ancient times. The earliest recorded recipe for pastry dates back to ancient Greece in 160 BC. Pastry chefs would use their hands or rudimentary tools such as sticks or stones before adapting to using wooden pins that were then later replaced by modern rolling pins we know today.
Make sure your pie dish is ready for its new doughy outfit – it’s about to get rolled on.
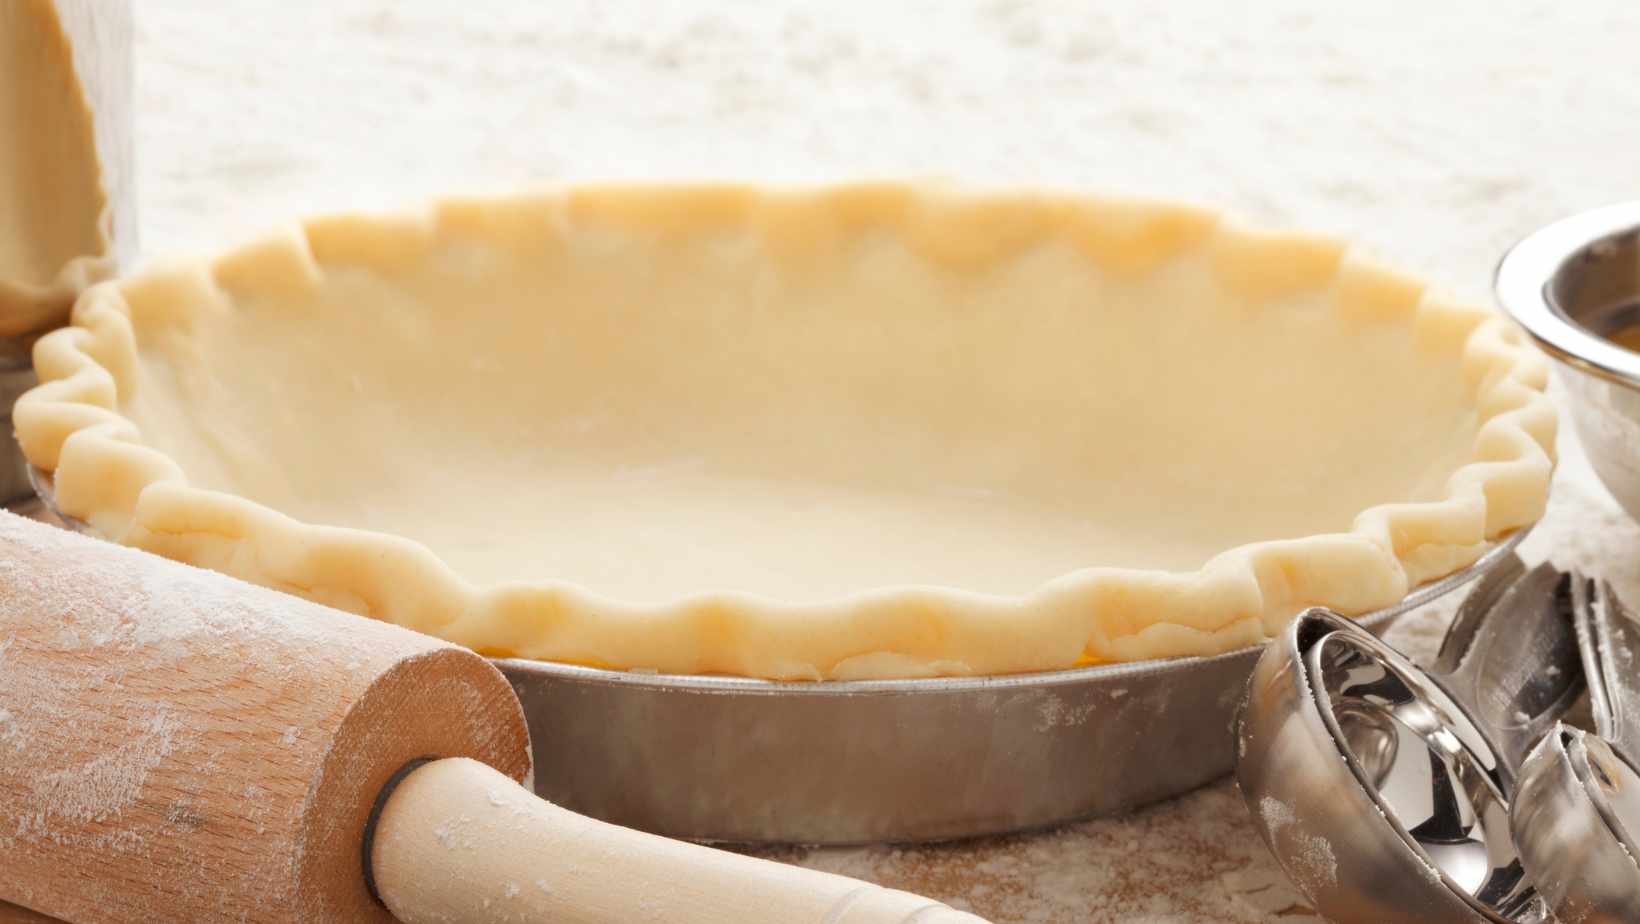
Place Rolled Dough onto Pie Dish
Placing the rolled dough onto the pie dish is a critical step in making a perfect pie. Follow these simple steps to ensure that your crust is aligned correctly and fits snuggly into the dish:
- Gently fold one half of the rolled out dough over the other half, then lift and place it neatly into your pie dish.
- Adjust the dough so that it covers every inch of your dish.
- Be sure to press down gently on the bottom and sides of the dough to avoid any air pockets between the crust and dish.
- Use kitchen scissors or a sharp knife to trim off any excess dough hanging over the edges of your pie dish.
- Create a fluted edge by holding one finger vertically against the inside edge of your crust, while using another hand’s thumb and index finger to pinch horizontally around it. Repeat this process around the entire circumference of your crust.
- Pop your prepared crust in for preheating before adding your filling for a delicious result.
Remember that practice makes perfect when learning how to roll out pie crusts, so don’t worry if you make mistakes along the way!
A helpful tip is to sprinkle just a bit of flour on top of your rolling surface as well as onto your rolling pin. This will help prevent tearing and sticking, giving you an easier time when aligning and placing on a baking tray.
With this blueberry filling, your taste buds will be singing sweet, sweet melodies while your waistline screams in agony.
Add Blueberry Filling
To add the blueberry filling to your mouth-watering blueberry pie, you need to follow a few steps in order to ensure its right taste and texture. Thaw frozen blueberries before mixing them with sugar, then mix the blueberries and sugar in a bowl to create the filling. Finally, pour the blueberry mixture onto your prepared pie crust.
Thaw Frozen Blueberries Before Mixing With Sugar
Blueberry Filling must be prepared properly to achieve the best taste and texture. Thawing Frozen Blueberries before mixing with sugar is an essential step in the process of making delicious blueberry filling.
Here’s a 6-Step Guide on how to thaw frozen blueberries before mixing them with sugar:
- Take out the required amount of frozen blueberries and transfer them to a large colander.
- Rinse under cold running water to get rid of any ice crystals or frost.
- Drain thoroughly, using paper towels if necessary, as excess moisture will ruin the texture of the filling.
- Add granulated white sugar to the bowl containing thawed blueberries, according to your recipe’s requirements.
- Mix together gently until the berries are evenly coated with sugar.
- Depending on your recipe, you might want to add lemon juice, cinnamon sticks or vanilla beans at this stage for extra flavor.
Thawing Frozen Blueberries is important as it allows for more even distribution of sugar while cooking and prevents clumping.
To prevent overcooking and loss of juiciness in the filling, do not add too much sugar during preparation. Additionally, if you want your filling thicker, add cornstarch instead of flour for easier mixing and a smoother consistency.
Looks like these blueberries are about to get a sugar high, hope they don’t crash before the filling is done.
Mix Blueberries And Sugar in Bowl
To prepare the blueberry filling, combine the sweet blueberries with a dash of granulated sugar in a mixing bowl. Once mixed properly, the sugared blueberries will be ready to be added as a delicious filling to any pastry.
- Add fresh or frozen blueberries along with the required amount of granulated sugar to an appropriately sized mixing bowl.
- Use your hands or a spoon to gently mix the berries and sugar together until they are coated evenly.
- The mixture is now ready for use in pies, tarts, or any other desired dish.
For best results, make sure that both the blueberries and sugar are at room temperature before combining them in the mixing bowl. Also, avoid damaging the delicate berries by using gentle strokes while mixing. The ideal ratio of sugar and blueberries can vary according to personal preference and recipe requirements.
I know someone who experimented with adding fresh lavender flowers along with their variation on this classic recipe. The results were amazing!
Why put blueberries on top of a pie when you can pour them inside and create a fruity explosion in every bite?
Pour Blueberry Mixture onto Pie Crust
To complete your blueberry pie, it is time to add the blueberry filling. Spread the mixture onto the pie crust with precision and care to ensure an even distribution.
- Once you have prepared the blueberry mixture, place it on a flat surface near the pre-baked pie crust.
- With a spoon or spatula, gently and evenly distribute the filling across the crust so that it completely covers its surface.
- Avoid pouring excess liquid or creating an uneven layer as this could result in an uneven baking process and cause your pie to cook incorrectly.
- Once spread out, proceed to carefully place the pie into the oven for further baking as desired.
To ensure that the pie looks delectable, be mindful of any gaps within your filling and adjust accordingly before baking. For best results, let your blueberry pie cool off entirely before consumption for optimal taste and texture. Pro Tip: Add some egg wash on top of your pie’s crust before baking for a more elegant golden-brown finish! When life gives you blueberries, make a pie and watch your worries fly.
Bake Blueberry Pie
To bake a delicious blueberry pie with frozen berries, you need to know how to make the pie crust. In this section, we’ll guide you through the process of baking a blueberry pie. Follow these sub-sections to achieve the perfect golden brown crust: Preheat Oven to 375°F, Place Pie Dish in Oven, and Bake for 45-50 minutes or Until Crust is Golden Brown.
Preheat Oven to 375°F
The ideal temperature to begin the baking process for your blueberry pie is a requisite factor in getting an excellent outcome. Achieve this by warming the oven at a temperature of 375°F before proceeding with any other steps.
- Open the oven and check if there are any baking pans or leftover meal remnants inside.
- Clean the oven with appropriate liquid detergent using a soft cleaning fabric
- Set the dial or touch button to the appropriate heat, i.e., 375°F.
- Wait for 10 minutes as it warms up to allow an even temperature distribution inside.
As you preheat your oven, ensure that your ingredients list is ready, apron tied on, and kitchen tools in reach. The blueberry pie’s success also depends on aligning all these factors before entering it in the heated oven.
Studies suggest that preheating gives overall sturdiness and consistency to baked items (Source: National Baking Institute).
Get ready to say goodbye to your waistline, because that blueberry pie is about to bake its way straight into your heart (and hips).
Place Pie Dish in Oven
Once the blueberry pie has been filled and topped, it is time to put the dish in the preheated oven.
- Open the oven door and pull out the wire rack.
- Gently slide the pie dish onto the center of the rack.
- Avoid jostling or moving the dish too much as it could result in splattering filling, uneven cooking, or even dropping and breaking.
- Carefully push the rack back into position using oven mitts or thick towels to prevent accidental burns from hot metal.
- Double-check that the dish is securely positioned on top of the rack and isn’t at risk of falling off during baking.
- Close the oven door gently but firmly.
It’s important not to open the oven door frequently throughout baking. Doing so can cause temperature fluctuations which may negatively affect how well-cooked your pie turns out. Instead, set a timer based on recipe instructions for an overall evenly cooked pie.
A study from Harvard Health Publishing discovered that consuming two servings of blueberries a week can reduce high blood pressure by 10%. Better keep an eye on the oven, because a burnt crust is a berry sad ending to this blueberry pie.
Bake For 45-50 minutes or Until Crust is Golden Brown
The ideal duration you should bake your blueberry pie for is around 45-50 minutes or until the crust turns into a golden brown. It’s an essential part of baking the perfect pie to ensure both the filling and crust cook appropriately.
Follow these simple four steps while you’re baking your blueberry pie until it reaches perfection:
- Set the preheated oven to around 375 degrees Fahrenheit.
- Place the pie pan on the middle rack and let it cook.
- Once you see your dough turn lightly golden brown, check if your filling has started to bubble thickly.
- Remove from the oven when you think both crust and filling have reached perfection.
Keep a close eye on details like temperature, taste, and texture. Until you achieve an even consistency throughout, neither underdone nor overdone.
Waiting for the blueberry pie to cool is harder than waiting for a Netflix sequel.
Let Blueberry Pie Cool
To let blueberry pie cool appropriately with a perfect texture, follow these steps. After removing the pie from the oven with the golden crust, let it cool for at least 30 minutes before cutting. You can serve the delicious pie at your preferred temperature – either warm or cold.
Remove From Oven And Let Pie Cool For at Least 30 Minutes
After baking the delicious blueberry pie, it is crucial to let it cool to ensure that all the ingredients settle and avoid burning your mouth. Cooling time also ensures that the filling sets correctly without getting runny or crumbling when sliced.
Here is a six-step guide on how to remove your blueberry pie from the oven and let it cool for at least 30 minutes before serving:
- Preheat your oven to 425 °F and bake the blueberry pie as per the recipe’s instructions.
- Once baked, take out the pie carefully from the oven, using oven mitts or kitchen towels as it will be hot.
- Place the freshly baked blueberry pie on a wire rack or any heat-resistant surface.
- Allow cooling at room temperature for at least 30 minutes to an hour before slicing and serving. Do not cut into slices while still hot as this leads to a wonky shape and oozy filling.
- If you desire a firmer texture for your pie filling, refrigerate it until cold before slicing.
- Serve with whipped cream or ice cream as desired.
It is worth noting that moving a fresh-out-of-the-oven blueberry pie might cause the fruit filling to spill over, ruining its presentation. Thus, it’s recommended to leave it untouched until cooled off before slicing.
Pro Tip: For neat slices of blueberry pie, use a sharp knife dipped in hot water and wipe clean after cutting each piece.
Whether you like your blueberry pie warm or cold, the only thing that matters is the scoop (or three) of vanilla ice cream on top.
Serve Warm or Cold
Blueberry Pie: Tips for Serving it the Best Way Possible
When it comes to serving a delicious slice of blueberry pie, there are different approaches you can take. Here are some tips on how to best serve this dessert.
- Room temperature: Allow the pie to settle and reach room temperature before serving. This will ensure that the flavors blend well with each other.
- Warmth: If you prefer your pie warm, gently reheat it in the microwave or oven until heated through. Serve immediately.
- Cool down: Alternatively, if you enjoy cold pies, refrigerate the blueberry pie for a few hours before serving. The chilled filling will provide an extra refreshing bite!
It’s worth noting that regardless of whether you prefer your blueberry pie warm or cold, always let it cool down before serving. This will prevent the filling from running and ultimately make for a beautifully presented dessert.
Don’t miss out on experiencing the perfect slice of blueberry pie – remember to follow these simple tips when serving and impress your guests!
I mean, who needs a fancy cake when you can just add a dollop of whipped cream on top of your perfectly baked blueberry pie?
Optional: Decorate With Whipped Cream
To decorate your blueberry pie with whipped cream, and achieve the best possible results, follow these important steps. Add whipped cream to the top of your blueberry pie, and serve it immediately.
Add Whipped Cream to Top of Blueberry Pie
To enhance the taste of the Blueberry Pie, consider adding a topping of Whipped Cream. Follow these 4-simple steps for this easy decoration:
- Chill a mixing bowl in the refrigerator for about 15 minutes.
- Add 1 cup heavy cream, 1 tablespoon sugar, and 1 teaspoon vanilla extract to the bowl.
- Use an electric mixer to beat the ingredients on high speed until it forms soft peaks.
- Place dollops of whipped cream onto individual pieces of Blueberry Pie.
For a fruit-forward approach, try mixing some fresh blueberries into the whipped cream before placing it onto the pie slices. This adds another layer of flavor and complements the blueberries already present in the pie filling.
Another option is to drizzle some warm caramel sauce over the top of the whipped cream before serving. The contrasting flavors of sweet and tangy work well with both blueberries and whipped cream.
By adding Whipped Cream as a decoration to your Blueberry Pie, you can create a delicious dessert that everyone will enjoy without much effort! You can wait to serve it, but let’s be real, the only thing immediately about this dessert is how quickly it’s going to disappear.
Serve Immediately For Best Results
Within moments of creating your edible masterpiece, it is essential to serve it promptly for the optimal taste sensation. To ensure a successful culinary experience, it’s crucial to be aware of some helpful tips and tricks.
- Anticipate serving time and prepare plates accordingly.
- Portion food in advance, ensuring that each plate receives an equal amount of tasty goodness.
- Place dishes on the table quickly and with ease.
- Ensure that all guests receive their meals simultaneously.
Executing these steps adequately means a better dining experience for everyone involved; the ingredients will be fresher, flavorsome, and easier to digest.
To supplement a satisfactory meal completion, garnishing your creations with whipped cream can elevate the culinary experience further. Be sure not to skimp on one of the final touches to guarantee an indulgent ending.
Remember that presentation makes a difference but getting food to the table in top form is equally important as enhancing its aesthetic appeal. For every recipe cooked up at home or in a professional setting- prompt serving always leads to success!
Recently, an executive chef shared his insight into quick-serving methods for busy restaurant settings; he emphasized how time management was key alongside attentive staff members who could deliver dishes rapidly without disrupting guests’ eating habits.