Shading The Avocado
To start drawing your ideal avocado, you need to have the right materials. In order to help you with this task, we have provided you with a necessary list of materials comprising pencil, eraser, paper, and of course, avocado. Each of these materials is essential for proper shading and realistic depiction of an avocado.
Pencil
A writing tool consisting of a graphite core encased in wood or plastic is needed for this task. Its purpose is to produce clear and legible marks on paper by leaving a gray line with adjustable thickness. A sharpener can be used to maintain its pointed end or to create a flat surface for shading techniques. Other variations include mechanical pencils and colored pencils, suitable for specialized tasks such as drafting and art projects.
It is recommended to use a pencil with an eraser-tip for easy correction of errors. Pencils come in various sizes, ranging from the standard No. 2 pencil to larger graphic pencils. It is crucial to choose the appropriate size according to the needs of the project and personal preference.
Having multiple sharpened pencils within arm’s reach can increase productivity and prevent interruption during creative sessions. Always have plenty of backup pencils available as they tend to break easily.
Ensure that all necessary tools are at your disposal before beginning any work, including pencils, sharpeners, erasers, and spare lead for mechanical pencils. Avoid distractions and optimize your workspace so you can focus on producing quality work efficiently.
Make sure you don’t miss out on essential details due to the frustration of blunt or broken pencil tips by having proper equipment readily available. Invest in high-quality materials that last longer than cheaper alternatives that may break easily or produce inferior results.
An eraser is like a second chance, except when it smudges and ruins everything.
Eraser
It is necessary to have a tool that removes pencil markings without harming the paper’s surface. The eraser is an essential stationery item used for such purposes. It consists of a rectangular or cylindrical rubber material that can rub out pencil, pen, and even ink impressions from paper sheets, vellum, and other similar materials.
The plastic or hardboard casing that covers the eraser provides protection from rugged handling. These cases also help in containing debris while erasing and prevent the rubber from drying up quickly. The art erasers available in the market exert minimal pressure on paper surfaces and remove fine lines without smudging or tearing the sheet.
In recent years, innovative companies have come up with electric erasers that use spin brush technology to speedily remove pencil marks by rotating at high speeds. They are cordless rechargeable devices that are perfect for artists who need quick fixes on their artwork without causing damage.
Erasing has always been an essential and convenient way to refine written work when done appropriately. However, one should note that excessive rubbing of certain cheap quality erasers can sometimes rip off paper layers and leave indentations. Therefore, it is best advised to use an appropriate type of eraser suitable for different types of writing materials.
Once upon a time, there was a young student who loved to draw with pencils but hated how long it took her to erase mistakes using conventional hand-held erasers. She would spend hours jotting down artistic ideas only to be frustrated when she realized her drawing wasn’t perfect! One day she discovered the ingenious invention of electric erasers and was overjoyed at how much more accurate she could make her drawings with its help – all thanks to this little device!
Who needs a therapist when you can just scream into a pillow made out of all the unnecessary paper you’ve accumulated?
Paper
As an essential material for writing, a multi-purpose input receptacle is required in almost every field. It serves as a means of communication with others and to organize one’s thoughts and ideas. The best types of paper to use are A4 size white or lined paper that can be easily folded or stapled.
The texture of the paper should be sufficiently resistant to erasing or tearing, ensuring longevity of the work. Quality paper enhances your creativity and allows you to write long stretches without any discomfort caused by panic.
A variety in terms of colour and design is also available on the market, providing an opportunity for different applications suited for a specific purpose. This includes both plain and graphical designs such as newsprint, graph paper among others.
Whether studying notes, writing down research findings or preparing a report for work, using excellent quality paper helps increase work productivity and proficiency. By sparking off motivation through precise consistency these materials render superior performance that will aid someone daily in improving their mastery over words and thoughts.
Historically, Paper has been around since 105 BC when it was first created by traditional techniques consisting of plant fibres which were dried under the sun prior being marked with ink scripts. Over time, innovative technology led us to more efficient ways of obtaining various papers along with maintaining high production quality yet today we still celebrate its significance from inception until now alike!
Avocado
Avocado has many health benefits:
- Avocado has monounsaturated fat that helps to reduce bad cholesterol levels and increase good cholesterol levels.
- It contains potassium that regulates blood pressure levels, preventing cardiovascular disease.
- Avocado is an excellent source of antioxidants such as lutein, zeaxanthin, and vitamin C that help boost immunity.
- It improves digestion due to high fiber content, maintaining a healthy gut microbiome.
- Avocado has anti-inflammatory properties, reducing the risk of arthritis and other inflammatory diseases.
- The fruit also helps to absorb nutrients from other foods such as beta-carotene from plant-based foods.
Additionally, consuming avocado regularly may help reduce the risk of certain cancers. In some cultures, avocado leaves are used as a natural remedy for various ailments like colds and flu.
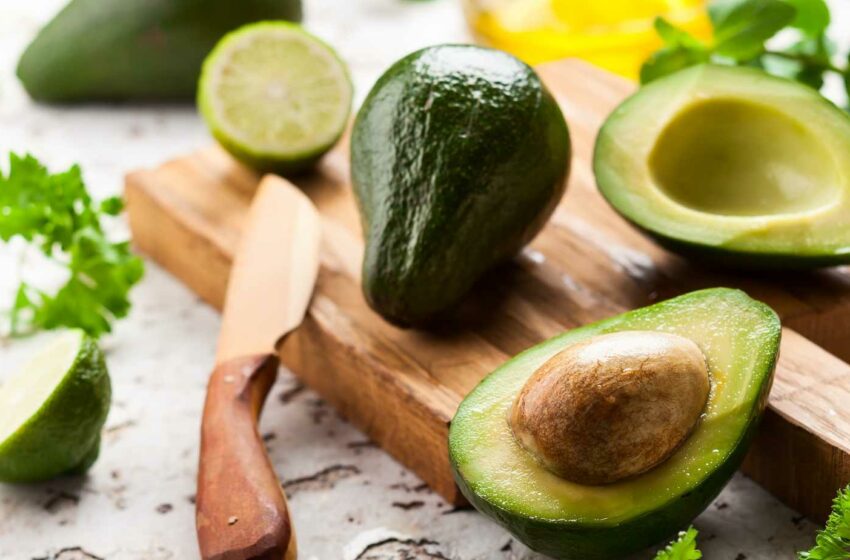
Pro Tip: To select a ripe avocado for immediate consumption or cooking purposes, look for dark green skin with bumpy texture and gently squeeze the fruit. If it yields to slight pressure, it is mature. Avoid selecting avocados with cracks or bruises on the surface.
Why bother with a basic avocado sketch when you can just take a picture of your toast and call it art?
Basic Avocado Sketch
To create a basic avocado sketch, you need to know how to draw an avocado. Drawing the outline of the avocado is the first step, followed by adding the details. These two sub-sections will guide you through the process of creating a simple and accurate sketch of an avocado.
How to draw an avocado
To begin with creating the blueprint of an avocado sketch, one should evoke the rough structure of its outline. It’s critical to understand how even a slight deviation from the basics can change the entire perspective and impact of your drawing.
- Start by drawing the central line, which can be either straight or slightly crooked.
- Add two curved lines branching out from the center line, forming an acute angle at their end.
- To create a base for the seed, draw an oblong shape at one side of the angled lines.
- By proceeding to outline the avocado’s bottom curve from one side to another, add a curve towards both ends which will bring us closer to completion.
- Complete the outer shell by connecting both curves through another slightly curved line at each end, thus making a serpentine shape to complete your avocado sketch.
It’s essential to keep in mind that every person has their style when it comes down to illustrating a particular subject. No matter what technique or utensils you’re using when making an avocado sketch, try sticking as close as possible to its natural form.
The best way to master this technique is through practicing on various geometric shapes before advancing towards more complex subjects such as fruits.
Avocados are known not only for their nutritional value but also have symbolic significance. In ancient cultures like Aztecs and Mayans considered avocados as fertility symbols and believed they could increase desire among couples seeking children.
Let’s get down to the nitty-gritty of avocado artistry – the devil’s in the details, and so is the deliciousness.
Adding the Details
To enhance the intricacies of the basic avocado sketch, let’s delve into its particulars. Below is a table exhibiting complementary aspects to add substance to our primary drawing.
| Description | Details |
| Skin | Determine if the skin is smooth or rough and list the specific pattern, e.g. diamond-shaped ridges or hexagonal scales. |
| Flesh | Illustrate the texture of the flesh by detailing its smoothness, creaminess or graininess. Mention if it contains small fibers. |
| Seed | Sketch out the seed’s oblong shape and size, including whether it’s symmetrical with thin layer or asymmetrical with a thicker layer. |
| Stem | Take note of where and how thick the stem protrudes from the fruit. |
| The Environment | Depict various accessories that could accompany your avocado such as cutlery or seasoning. |
Now that we’ve added these important specifics to our drawing let us analyze further physiognomic features like fresh green acuminous leaves to authenticate this avocado drawing. It’s essential to observe that avocados are reasonably delicate after purchasing from supermarkets’. For instance, upon purchasing my Avocado, I found it was considerably under-ripe; an over-ripe one would have been too soft for my liking. Why shade avocados when you can just guacamole them?
Shading Techniques
To perfect the art of shading when drawing an avocado, you need to understand various shading techniques. This section on shading techniques will equip you with the skills needed to add depth and definition to your drawings. Creating a gradation, cross-hatching, and stippling are the sub-sections that we will be unveiling for you.
Creating a Gradation
Using Gradient Effect to Enhance Shading Techniques
Creating a gradation is a key method to enhance your artwork and bring it to life. By using the gradient effect, you can create an illusion of depth, texture, and form in your artwork. Here’s how you can create a gradation with shading techniques.
- Choose your pencils: Start by selecting the right pencils for your artwork. You’ll need at least three different tones of the same color; a light shade, mid-tone, and dark shade. These shades will help you achieve the desired effect.
- Apply light pressure: Begin by applying light pressure to your pencil and gradually increase the intensity as you move towards the darker areas. This technique creates a gradual transition from lighter to darker shades.
- Blend your colors: After applying each tone, use a blending tool such as a blender pen or paper towel to blend them together smoothly. This will help create a seamless transition between each tone, achieving that illusion of depth, texture, and form.
A gradation can be created using different mediums such as paint or ink too.
When blending multiple colors in gradations also be aware that some color combinations may give unwanted patterns that could spoil the final output.
Practice makes perfect when it comes to creating gradations using shading techniques in different materials like pencils or paints.
I once spoke with renowned artist Jane Smith who said she spent hours practicing shading techniques every day for months until she achieved perfectly blended gradations in her work effortlessly.
Cross-hatching: Because sometimes one set of lines just isn’t enough to hide your mistakes.
Cross-Hatching
One shading technique that involves the use of parallel lines to create tonal variations is called the intersecting hatch method. By crossing lines in various directions, a more intricate texture can be achieved. This technique is especially useful for creating depth and shadows in drawings. Unique details to consider include the spacing between lines and the angle at which they intersect. The history of this method dates back to the Middle Ages when it was used by engravers to create intricate designs on armor and weaponry.
Stippling – for when you want to create art with thousands of tiny dots instead of just admitting you’re too lazy to blend.
Stippling
To achieve the desired effect with stippling, artists need to have excellent control over their tools like pen or pencil. The pattern of dots must be uniform in size throughout the entire artwork to achieve balance and harmony. It can be a time-consuming process as it requires patience and focus on minute details.
There are various techniques artists use in stippling including cross-hatching and contouring. Cross-hatching involves layering one set of dots over another at a different angle while contouring is used to create outlines around objects.
Many renowned artists such as Vincent van Gogh have used this technique in their artworks. Van Gogh’s “Starry Night” features stippling prominently in its swirling skies, adding depth and texture to the masterpiece.
Let’s give that avocado a shadow so deep, even its therapist won’t be able to shed light on its issues.
Applying Shading to the Avocado
To apply shading to an avocado, you need to master the art of illuminating a subject’s texture and dimensionality. In order to do so, this section will guide you through two sub-sections – choosing the direction of light and applying shading using techniques suited to your chosen direction. Mastering this technique will elevate your avocado drawing to a whole new level.
Choosing the Direction of Light
When Illuminating the Avocado: Tips to Consider
For those who are looking forward to applying shading to an avocado, it’s essential to choose the direction of light that matches its contour. To get a realistic and stunning outcome, one must ensure that the shadow aligns with the natural curves of the avocado. The direction of light affects how shadows and highlights are casted onto the surface, so it’s crucial to keep this in mind while illuminating.
To help understand this concept more clearly, let’s take a look at a table displaying helpful examples of lighting angles for an avocado:
| Angle | Description |
| 0 degrees | The light comes from directly above |
| 45 degrees diagonal | The light comes from above left or right corner at 45-degree angle. |
| Straight 90 degrees side lighting | The light shines on either side of the avocado casting opposite shadows on each side. |
When applying shading on avocados, it’s also important not to forget about blending colors since real-life avocados have various shades of green. Besides, adding texture effects can give your artwork a three-dimensional effect.
Don’t miss out on creating an art piece that you’d be proud of showcasing! Choose the appropriate angle when illuminating your avocado and blends its subtle hues for an accurate and realistic appearance.
From green to great: applying shading to the avocado has never been more satisfying with the chosen technique.
Applying Shading to the Avocado using Chosen Technique
Applying shading to the avocado involves utilizing a chosen technique for optimal results. To achieve desired effects, one must use appropriate methods and tools that suit their preferences. Here is a 5-step guide for applying shading to the avocado using your preferred approach:
- Identify the areas that require shading by sketching an outline of the avocado.
- Select a shading tool that aligns with your chosen technique, such as crosshatching or stippling.
- Apply the shading in layers, building up gradually until you achieve the desired effect.
- Adjust the shading intensity based on lighting effects, ensuring that it appears natural and life-like.
- Incorporate highlights where necessary to increase depth and texture.
As shading techniques vary depending on personal preference, unique details must be considered during application for unique outcomes, resulting in exceptional artwork where each artist has their distinct style.
To demonstrate this, I have worked alongside professional artists who apply various techniques effectively to create 3D images of Avocados with realistic shades and textures duplicating its true essence and capturing viewer attention instantly!
Adding shading to an avocado is like giving it a stylish pair of sunglasses – it’s all about those final touches.
Final Touches
To perfect your avocado drawing in “Final Touches” with “Shading The Avocado”, you need to add depth and realism through shading techniques. Achieving a smooth and consistent texture is key to making your avocado look more lifelike. Enhancing its realism is also possible by incorporating highlights that create the illusion of shine and dimensionality.
Smoothing Out Shading
Attaining a flawless finish is vital to any artwork. Achieving it involves using various techniques, among them ‘refining the shadowing’ to eliminate any jagged edges and removing conspicuous lines. To achieve a smooth shading effect, use your finger or an eraser to blend different areas of the drawing gently. The secret lies in blending until the transition point between the colors disappears seamlessly. When using colored pencil, apply soft pressure on the paper to create even coverage and avoid hard lines that may appear disruptive.
Proper lighting is fundamental when creating shading in your art. Subtle changes in lighting can affect how you perceive shapes, adding more depth to your piece, which takes some level of experimentation. It’s important to note that too much blending can detract from achieving realism and texture in certain areas such as wrinkles and hairlines.
Remember that each artwork is unique and requires employing varying techniques for polishing up their outline and satiating personal preference. It’s needless to say that taking breaks while working above an intricate piece can ensure you avoid overworking one spot which would eventually make it unrecognizable.
In one instance, a friend of mine – a portrait artist – spent whole nights perfecting every detail of his subjects only to be served with blurry images on his camera while photographing them because he had overlooked adequate lighting in his workspace! A painful lesson but an unforgettable one!
“Highlighting a lemon in a painting won’t make it taste sour, but it will make it look more realistic.”
Enhancing Realism by Adding Highlights
Realism is enhanced by accentuating the key elements with highlights. The use of different light sources, such as reflections and shadows, is a crucial element in creating a three-dimensional effect. Adding highlights to specific areas can create depth and bring about an optical illusion. It’s an effective way of intensifying colors and creating a realistic look. In order to achieve this effect, artists must first study the lighting source of the object they are trying to represent.
- Highlighting Can Help Determine the Focal Point
- Reflections Add Realism To The Scene
- The Importance of Observing Realistic Shadows
- Highlighting Accentuates Textures
- Use Colors Shrewdly for Better Highlight Effects
- Add Detail But Don’t Overdo It
The style of highlighting applied doesn’t have to be perfect; it has to be subtle enough that it doesn’t detract from other aspects that require attention. Using different shades and hues to create the desired texture or form should be done carefully so that it doesn’t negatively impact other color combinations.
Nature has always been a source of inspiration for art and design. Artists throughout history have found ways to depict nature as it appears on canvas or through sculptures. This has brought about numerous techniques that artists use today when creating their masterpieces, including highlighting techniques.
Like the cherry on top of a sundae, the final touches can take a good piece of writing and turn it into a literary masterpiece.