How To Prepare Collard Greens For Freezing
Gather Required Materials for Collard Greens Freezing
To prepare collard greens for freezing, you’ll need proper materials to streamline the process. Here are three essential supplies that would provide enough support to ease the task:
- Kitchen knife or vegetable chopper
- Large pot with boiling water
- Colander and baking sheets or freezer-safe containers
It’s important to ensure your utensils and tools are clean and dry before starting this process.
Additionally, using a sharp blade or a vegetable chopper can make it easier to chop collard greens without over-working the leaves. A dull blade can lead to bruising and damage.
Pro Tip: Placing cooked collard greens in an ice bath helps lock in nutrients and vibrant green color before transferring them to baking sheets or freezer-safe containers for storage.
Get ready to show those collard greens who’s the boss in the kitchen, because we’re about to prepare them for the freezer!
Preparing The Collard Greens
To prepare collard greens for freezing, you need to remove the stems, wash the leaves, and blanch the leaves. Removing stems ensures that the leaves cook evenly; washing gets rid of dirt and grime; blanching helps preserve the collard greens’ taste, texture, and color.
Removing Stems
Preparing the Collard Greens – Removing Unwanted Parts
To prepare collard greens, it is essential to remove the unwanted parts including the stems. Generally, collard green stems are tough and fibrous, making them undesirable for culinary purposes.
Here is a six-step guide to removing the unwanted parts from collard greens:
- Start by separating the leaves from the stem.
- Lay each leaf flat on a cutting board with its top facing down.
- Trim off any thick or tough stem running up each leaf’s center using a sharp knife.
- If portions of the central stem remain, gently pull or cut them out using a knife.
- If necessary, trim away any brown spots or damaged areas present on the leaf material before preparing them further.
- Finally, rinse the leaves under cold water thoroughly and pat dry with paper towels before proceeding to cook them based on your recipe.
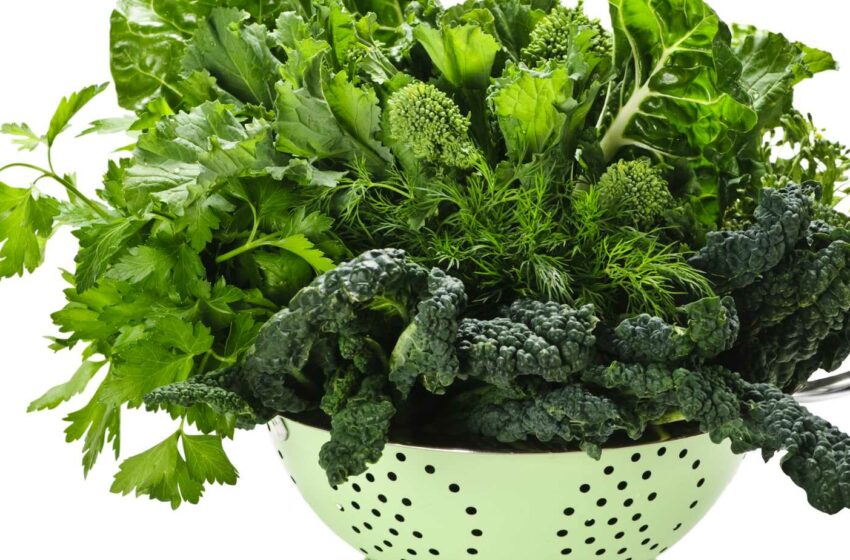
Collard greens have large leaves that require more cleaning effort than other vegetables like spinach and kale. Therefore, it’s best to soak and wash cabbages individually in a bowl of water before drying them using paper towels.
It’s good practice to use different knives for chopping raw meat or vegetables as when you prepare collard greens; they may contain dirt particles that may affect meat preparation.
Looks like these collards are getting a spa treatment, but let’s hope they don’t ask for a cucumber slice for their eyes.
Washing The Leaves
First Preparing Measure – Cleansing the Collard Green Leaves
To ensure any dirt, debris, or fertilizers are removed, the first step in preparing collard greens involves washing the leaves.
Four-Step Guide to Wash the Leaves:
- Fill a sink with cold water.
- Agitate the water and dip each leaf into it separately, making sure they are submerged entirely.
- Remove any visible dirt from the leaf’s surface using your fingers or a brush.
- Rinse the leaves under running cold water and pat dry with a cloth.
In addition to this, be sure to remove excess moisture before chopping by placing them in a salad spinner or wrapping them tightly in paper towels.
Pro Tip: For optimal freshness and crispness, wash collard greens only when you are ready to cook them.
I always thought blanching meant scaring someone unexpectedly, but it turns out it’s just a fancy cooking term for boiling water.
Blanching The Leaves
To prepare the collard greens, blanching is a key step in ensuring that the leaves are tender and easy to work with.
Here is a simple 3-step guide to blanching the leaves:
- Choose a pot that is large enough to accommodate the collard greens.
- Fill the pot halfway with water and bring it to a boil.
- Add the collard greens to the boiling water and cook for 2-3 minutes until they turn bright green in color.
It’s important not to overcook or undercook the collard greens as both can result in an unpleasant texture. Once you have finished blanching, drain the collard greens and pat them dry with paper towels.
A unique detail to note is that blanching can help reduce any bitterness in the collard greens, resulting in a more enjoyable flavor profile.
To make sure your collard greens are prepared perfectly, consider these suggestions:
- Cut off any thick stems from each leaf before blanching. This will guarantee even cooking throughout each leaf.
- If you want a more flavorful dish, try adding seasonings like garlic powder or red pepper flakes while cooking. These spices can add dimension and complexity to your dish without overwhelming it.
Overall, by following these tips and tricks for preparing collard greens, you’ll be able to enjoy them at their best – tender and packed with flavor!
Don’t let your collard greens go bad, freeze them now and save them for a rainy (or lazy) day.
How to Freeze Collard Greens
To freeze collard greens successfully, packing and labeling them properly is essential. In this section, you will learn how to freeze the collard greens step-by-step. You will also get to know the importance of packing and labeling the greens before storing them. Additionally, we will cover the critical factors to keep in mind while storing the collard greens for long-lasting freshness.
Packing And Labeling The Greens
Are you looking to store collard greens for future use? Proper packing and labeling are crucial to ensure they remain fresh and safe.
Follow these 4 steps to pack and label your collard greens:
- Thoroughly wash the greens under running water, removing any dirt or debris.
- Cut off the tough stem and separate the leaves.
- Place the greens in a plastic freezer bag, removing as much air as possible before sealing it.
- Label the bag with the date of packing and store it in the freezer for up to 8 months.
It is important to note that once defrosted, collard greens lose their crispness and texture. Therefore, they are best used cooked rather than raw.
To enhance shelf life, add a paper towel inside the plastic freezer bag to absorb excess moisture.
Don’t miss out on enjoying fresh collard greens even when they are out of season! Proper packing will ensure you always have access to this delicious vegetable. Why let your collard greens go bad when you can simply freeze them and have a delicious side dish waiting for you whenever you want to leaf the house?
Storing The Collard Greens
One way to maintain the freshness and quality of collard greens is by freezing them. To store the collard greens, follow these simple steps:
- Wash the collard greens thoroughly and pat them dry.
- Chop off the stems and separate the leaves into smaller pieces.
- Blanch the leaves in boiling water for about 2-3 minutes or until they turn bright green.
- Transfer the blanched leaves into ice-cold water to stop cooking. Drain and squeeze any excess moisture out.
- Store them in airtight containers or freezer bags, making sure to remove as much air as possible before sealing.
It is essential to note that frozen collard greens will not retain their crunchy texture when thawed. However, they still work well in recipes that involve cooking or blending.
Pro Tip: For added convenience, freeze collard greens in individual portions for quick access.
Hopefully your thawing skills are better than your dance moves, or you’ll end up with a bowl of mushy greens.
Thawing And Cooking The Collard Greens
To thaw and cook the collard greens that you have frozen according to the section ‘Thawing and Cooking the Collard Greens’ with sub-sections ‘Thawing the Greens, Cooking the Greens’, we have solutions for you. You can follow the guidelines on how to thaw and cook your frozen collard greens effectively and efficiently without losing their taste and nutrients.
Thawing The Greens
To prepare the collard greens, it is necessary to thaw them first. Here’s how you can defrost the greens to bring out their natural flavors and freshness.
- Remove the collard greens from the freezer and place them in a large bowl or colander.
- Allow them to thaw at room temperature for an hour or two. Alternatively, you can also defrost them overnight in the refrigerator.
- Once defrosted, rinse the collard greens thoroughly under cold water to remove any excess ice crystals or freezer burn marks.
- Gently pat dry with paper towels or a clean kitchen towel before adding it to your recipe.
- If you don’t plan on using all the collard greens at once, store any leftovers in an airtight container in the fridge for up to three days.
It is important not to use hot or warm water while defrosting as this may cause uneven cooking of the greens. For best results, avoid refreezing previously frozen collard greens. Pro Tip: Consider blanching collard greens prior to freezing to keep their color and structural qualities intact. Why bother with fancy garnishes when the real star of the dish is already in the name? Collard greens, let’s cook ’em.
Cooking The Greens
For a satisfying meal, knowing how to prepare Collard Greens is key. Cooking these Greens can yield delicious and nutritious results for the best of meals.
Here is a simple 4-Step Guide on how to cook Collard Greens:
- Thaw: Take out frozen Collard Greens from the freezer and place them in the fridge overnight. Then, take them out and let them sit at room temperature before cooking.
- Cook: Rinse and chop the greens into large pieces. Heat a pot of salted water on high heat, add the greens, cover and bring to boil. Reduce the heat and let it simmer for about an hour.
- Season: Discard the water, then add butter, garlic or any spice of your liking to season it up. Combine everything well over low heat for about five minutes.
- Serve: Finally, drain the excess liquid and serve hot as a side dish!
It’s interesting to note that cooked Collard Greens are not only healthy but also delicious with great nutrient value. According to Healthline.com, they are a good source of vitamins A, C & K with several health benefits worthy of its inclusion in every diet plan.